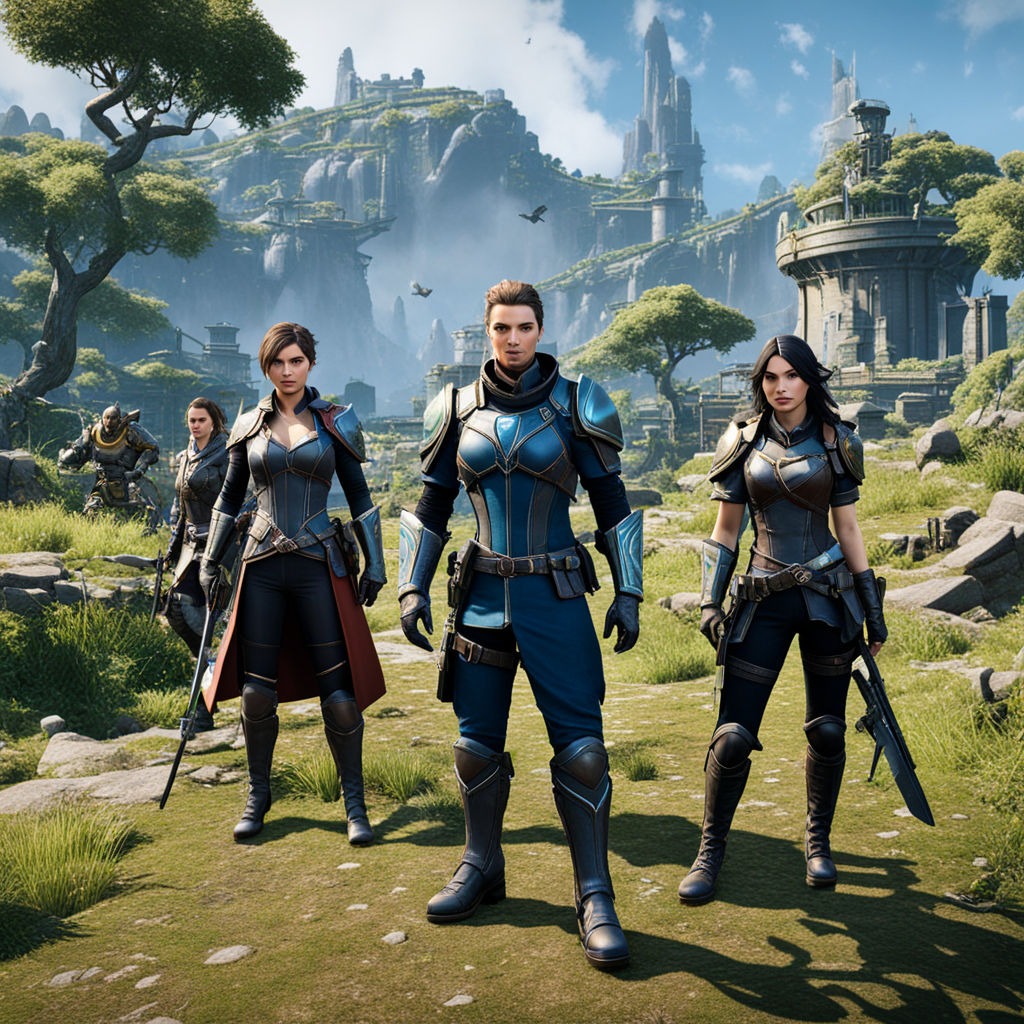
Welcome to the World of Unity Game Development
Welcome to the dynamic world of Unity, the powerhouse behind some of the most innovative games across the globe! Whether you’re an aspiring game developer or a seasoned pro, Unity offers an unmatched blend of versatility and power. Established in 2005, Unity has grown into a titan in the game development industry, supporting a myriad of platforms, from mobile to console to VR.
Unity’s significance lies in its ability to democratize game development. Its user-friendly interface and extensive documentation make it accessible to beginners, while its robust features cater to the complex needs of major studios. Indie developers adore Unity for its flexibility and scalability, allowing them to create stunning games without needing an enormous budget. On the other hand, industry giants appreciate Unity’s comprehensive toolset that can handle intricate game mechanics and breathtaking graphics.
From indie hits like “Hollow Knight” to AAA titles like “Monument Valley”, Unity’s influence is everywhere. It’s not just about games either; Unity is also a favorite for creating simulations, architectural visualizations, and interactive experiences.
So, if you’ve ever dreamed of bringing your game ideas to life, Unity might just be your perfect match. Stick around as we dive into everything you need to know to get started on your Unity journey! For more inspiration, check out Unity’s official Made with Unity page, showcasing a variety of amazing projects created using the engine. Ready to jump in? Let’s go!
Understanding Unity: An Overview

What is Unity?
Unity is a cross-platform game engine developed by Unity Technologies, first announced and released in June 2005 at Apple Inc.’s Worldwide Developers Conference. It was created with the vision of democratizing game development, making powerful tools available to developers of all sizes. Over the years, Unity has evolved into a comprehensive development environment, enabling creators to build high-quality 2D, 3D, VR, and AR experiences.
Unity’s primary draw is its integrated development environment (IDE), which includes an intuitive drag-and-drop interface, a powerful scripting API using C#, and a vast array of built-in features such as physics, animation, and networking. Its versatility is further amplified by the Unity Asset Store, where developers can buy or sell assets, plugins, and tools, speeding up the development process.
Why Choose Unity?
- Cross-Platform Compatibility: Unity supports over 25 platforms, including Windows, Mac, iOS, Android, PlayStation, Xbox, and more. This makes it easier for developers to reach a wide audience without rewriting their code for each platform.
- User-Friendly Interface: The Unity Editor is designed to be intuitive and accessible, making it a great choice for beginners. At the same time, it offers advanced features for experienced developers.
- Strong Community and Resources: Unity boasts a vast community of developers, with numerous forums, tutorials, and documentation available online. The Unity Asset Store also provides a plethora of assets and tools to accelerate development.
- Continuous Improvement: Unity Technologies continuously updates the engine, introducing new features and improvements. This commitment to innovation ensures that developers have access to the latest tools and technologies.
- Flexible Licensing: Unity offers a range of licensing options, including a free version for individual developers and small teams, making it accessible to a wide range of users.
Success Stories and Notable Games Made with Unity
Unity’s capabilities are showcased in a variety of successful games across different genres. Here are a few notable examples:
- “Hollow Knight”: This critically acclaimed indie game, known for its beautiful hand-drawn art and challenging gameplay, was developed using Unity. Its success on multiple platforms demonstrates Unity’s strength in 2D game development.
- “Monument Valley”: This puzzle game captivated players with its stunning visuals and innovative mechanics. Its development on Unity allowed it to reach a broad audience across mobile devices.
- “Pokemon Go”: The global phenomenon that brought augmented reality gaming to the masses was built with Unity. This demonstrates Unity’s prowess in developing AR experiences.
- “Ori and the Blind Forest”: A visually stunning platformer that has won numerous awards for its art and design, showcasing Unity’s capability in creating high-quality 2D and 3D games.
With such a diverse portfolio of games and applications, it’s clear why Unity remains a top choice for game developers around the world. Whether you’re aiming to create the next indie hit or a blockbuster game, Unity provides the tools and support you need to turn your vision into reality. For more examples of what Unity can achieve, take a look at their Showcase page, where you’ll find a wide array of projects highlighting the engine’s versatility.
Getting Started with Unity

System Requirements
Before diving into Unity, it’s essential to ensure your system is up to the task. Unity is designed to be flexible, but having the right hardware can make a significant difference. At a minimum, you’ll need a system with Windows 7 SP1+, macOS 10.12+, or Ubuntu 16.04+, an SSE2-compatible CPU, a DX10-capable GPU, 4 GB of RAM, and 5 GB of available storage. For a smoother experience, aim for Windows 10, macOS 10.14+, or Ubuntu 18.04+, a multi-core processor like an Intel i7, a DX11-capable GPU, 8 GB of RAM, and a fast SSD with at least 10 GB of space.
Downloading and Installing Unity
Getting Unity up and running is straightforward. Start by downloading the Unity Hub from the Unity Download Page. The Unity Hub is your all-in-one management tool for Unity projects, installations, and licenses. After installation, open the Hub and create a Unity ID if you don’t have one. This ID will manage your Unity services and licenses. Next, click on the “Installs” tab, then “Add,” and select the Unity version you want to install, preferably the latest stable release. Choose the modules you need, such as Android or iOS Build Support, based on your target platform, and follow the prompts to complete the installation.
Navigating the Unity Interface
Once Unity is installed, it’s time to get acquainted with the Unity Editor. The Scene view is your playground for creating and arranging game objects, while the Game view shows how your game looks during gameplay. The Hierarchy window displays all game objects in your current scene, making it easy to manage them. The Project window acts as your file manager, showing all assets in your project, and the Inspector window gives detailed information and settings for selected game objects. The Console window is essential for debugging, showing messages, errors, and warnings from your scripts.
Tips for Customizing the Workspace
Customizing your Unity workspace can significantly enhance your productivity. You can dock and rearrange panels by dragging their tabs to different parts of the screen to create a layout that suits your workflow. Once you have a layout you like, save it by going to the “Window” menu, selecting “Layouts,” and then “Save Layout.” Familiarize yourself with Unity’s keyboard shortcuts to speed up your workflow. You can find a comprehensive list in the Unity documentation or through the “Edit” menu under “Shortcuts.” Additionally, adjust the Editor theme and other visual settings in the Preferences menu (Edit > Preferences on Windows, Unity > Preferences on macOS) to create a comfortable working environment.
Core Concepts and Components
Game Objects and Components
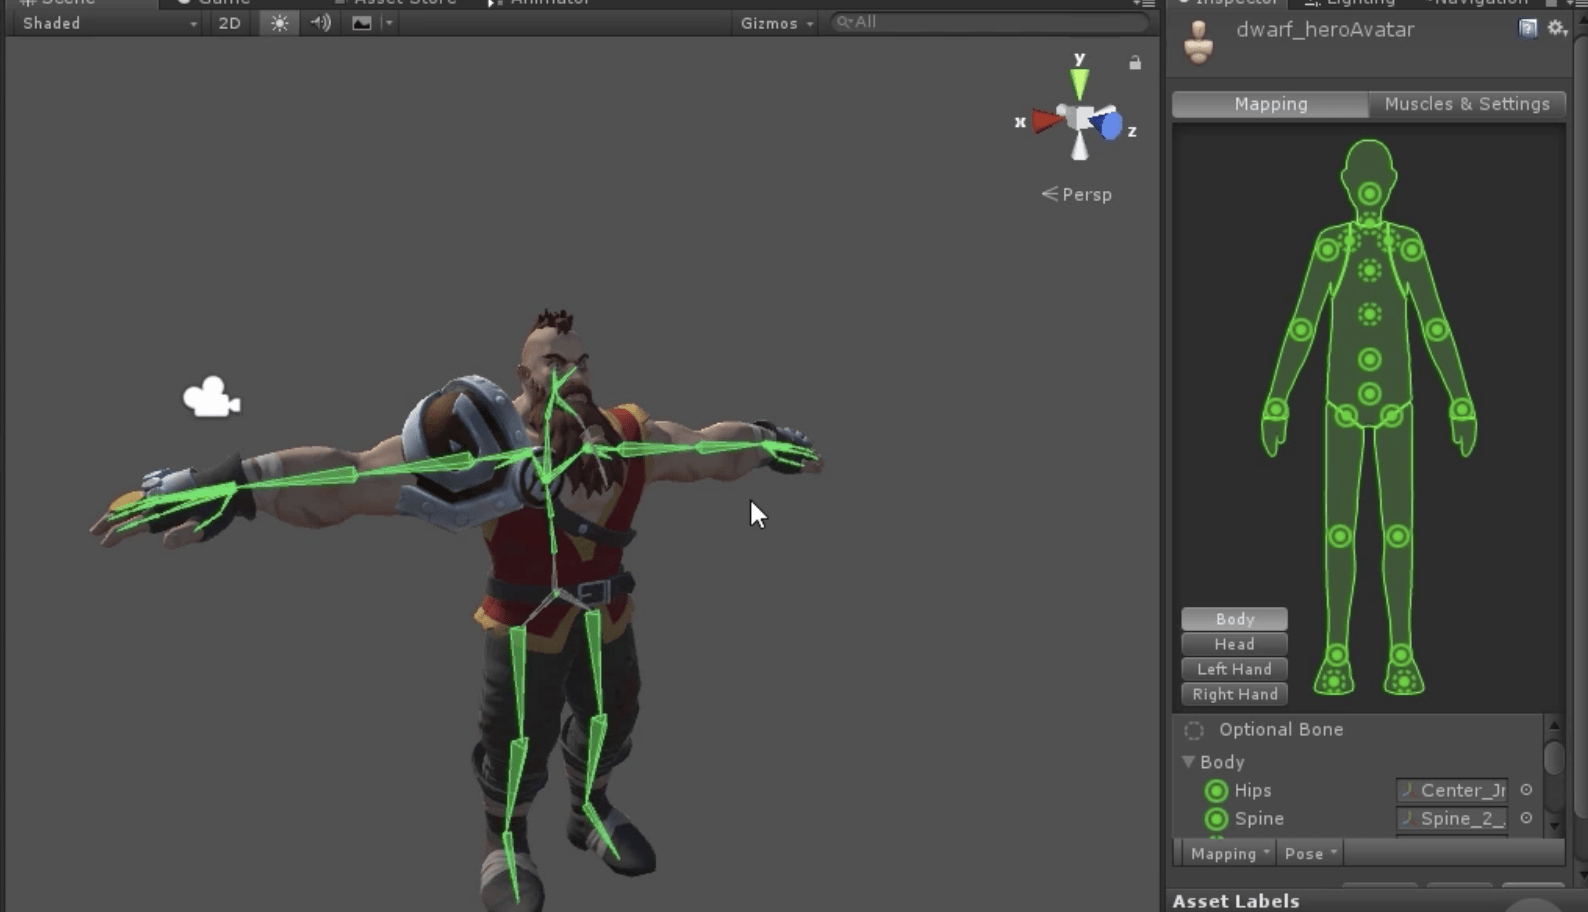
In Unity, everything you create in a game scene is a game object. These are the building blocks of your game, representing characters, environments, items, and more. A game object in Unity is essentially an empty container, which becomes functional by adding various components to it. Components are the features that give game objects their behavior and appearance. For example, a Transform component defines an object’s position, rotation, and scale in the scene. A Renderer component determines how an object appears visually, while a Collider component defines the physical shape for interactions and collisions. By combining different components, you can create complex and interactive objects.
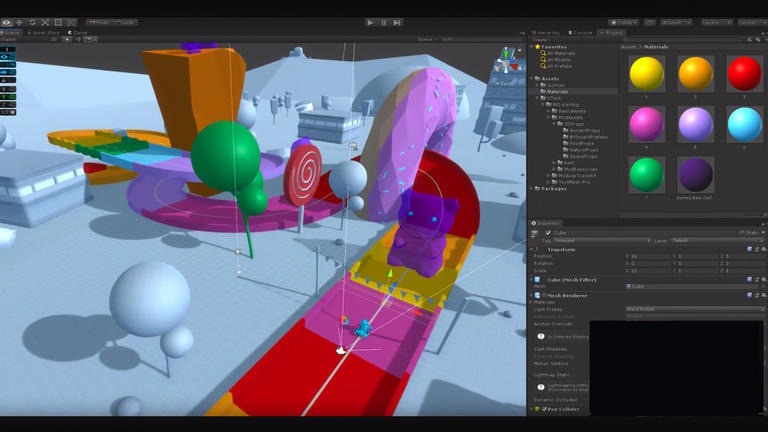
Scenes and Assets
Scenes in Unity are akin to levels in a game. They are where you place and arrange game objects, defining the various environments and stages of your game. You can think of a scene as a canvas where you design everything that happens within a particular level or segment. Assets are all the resources you use in your game, such as 3D models, textures, audio files, and scripts. These assets are stored in the Project window and can be imported from your computer or the Unity Asset Store. The Asset Store is a treasure trove of pre-made resources, from simple textures to complete character models, which can save you time and effort during development.
Scripting in Unity
Scripting in Unity is primarily done using C#, a powerful and versatile programming language. Scripting allows you to create custom behaviors and interactions for your game objects, making your game dynamic and interactive.
To get started with scripting, you’ll create scripts in C# and attach them to game objects. Here’s a quick introduction to the basics:
- Creating a Script:
- In the Project window, right-click and select Create > C# Script. Name your script, and double-click it to open it in your code editor (typically Visual Studio).
- Understanding the Script Structure:
- A basic Unity script will have two main methods: Start() and Update(). The Start() method runs once when the object is created, and the Update() method runs once per frame, making it ideal for handling continuous inputs or changes.
- Attaching Scripts to Game Objects:
- Once your script is ready, you can attach it to a game object by dragging it from the Project window onto the object in the Hierarchy window. The script will then appear as a component in the Inspector window, where you can configure its public variables.
Here’s a simple example of a script that makes a game object move forward:
using UnityEngine;

public class MoveForward : MonoBehaviour
{
    public float speed = 5f;

    void Update()
    {
        transform.Translate(Vector3.forward * speed * Time.deltaTime);
    }
}
In this script, the speed variable determines how fast the object moves. The Update() method uses the Translate() function to move the object forward every frame.
By mastering game objects, components, scenes, assets, and scripting, you’ll have a strong foundation to build upon as you create more complex and engaging games. For more detailed tutorials and examples, Unity’s Learn platform offers an extensive library of resources to help you on your journey.
Building Your First Game
Conceptualizing Your Game
The first step in creating a video game is to conceptualize your idea. This is where the importance of a Game Design Document (GDD) comes into play. A GDD serves as a blueprint for your game, detailing its mechanics, story, characters, and overall vision. It helps keep your project organized and ensures everyone on your team is on the same page.
When brainstorming and refining your game ideas, start broad and then narrow down your concepts. Consider what genre excites you, the type of gameplay mechanics you enjoy, and the kind of experience you want players to have. Sketching out rough ideas and discussing them with peers can help refine your vision. Remember to keep your initial project manageable, especially if it’s your first time using Unity.
Creating the Game World
Once you have your game concept, it’s time to create the game world. In Unity, this often begins with terrain generation and environment design. Unity provides robust tools for shaping and texturing terrains, allowing you to create detailed landscapes quickly.
To start, go to the GameObject menu, select 3D Object, and then Terrain. This adds a new terrain object to your scene. Use the Terrain Editor tools to sculpt the landscape, paint textures, and add features like trees and water. You can also import pre-made terrains from the Asset Store if you prefer.
Adding and manipulating 3D models is another crucial aspect of game world creation. Models can be created in external 3D modeling software or downloaded from the Asset Store. Once you have your models, import them into your project by dragging them into the Project window. From there, you can place them in your scene, adjust their position, rotation, and scale, and apply materials and textures to make them look realistic.
Implementing Game Mechanics
With your game world in place, the next step is to implement game mechanics using C# and Unity. Begin with basic movement and interaction scripts. For example, you might create a script that allows the player to move around the environment using keyboard inputs.
Here’s a simple script to get you started:
using UnityEngine;

public class PlayerMovement : MonoBehaviour
{
    public float speed = 5f;

    void Update()
    {
        float moveHorizontal = Input.GetAxis("Horizontal");
        float moveVertical = Input.GetAxis("Vertical");

        Vector3 movement = new Vector3(moveHorizontal, 0.0f, moveVertical);
        transform.Translate(movement * speed * Time.deltaTime, Space.World);
    }
}
Attach this script to your player object, and you’ll have basic movement functionality. Incorporating physics and collisions adds another layer of realism and interaction to your game. Unity’s physics engine handles most of the heavy lifting for you. To enable physics on a game object, add a Rigidbody component to it. This makes the object respond to forces and collisions naturally. You can also add Collider components (like Box Collider, Sphere Collider, etc.) to define the physical boundaries of objects.
For example, to make your player object collide with the environment, ensure both the player and environmental objects have Collider components attached. Unity will automatically handle the physics interactions between them.
Virtual Reality Integration
If you’re aiming to create a virtual reality (VR) experience, Unity offers extensive support for VR development. Unity’s XR Management package simplifies the process of deploying to various VR platforms like Oculus, HTC Vive, and more. Start by installing the XR Management package through the Package Manager. Then, configure your project for your target VR platform by following Unity’s setup instructions.
By focusing on these core aspects – conceptualizing your game, creating the game world, and implementing game mechanics – you’ll be well on your way to building your first game. For more detailed tutorials and examples, Unity’s Learn platform offers an extensive library of resources to help you on your journey.
Publishing and Beyond
Building and Exporting Your Game
Once your game is polished and ready, it’s time to prepare it for various platforms like PC, mobile, and console. Unity makes this process relatively straightforward.
- Preparing Your Game:
- Ensure all assets and scripts are optimized for performance.
- Test your game thoroughly on the target platforms to catch any platform-specific issues.
- Building for Different Platforms:
- PC: Go to File > Build Settings, select PC, Mac & Linux Standalone, and choose your target operating system (Windows, macOS, or Linux). Set the appropriate options, then click Build and Run.
- Mobile: Select either iOS or Android in the Build Settings. For Android, ensure you have the Android SDK installed and configured. For iOS, you’ll need to export to Xcode for final building and deployment.
- Console: Building for consoles like PlayStation, Xbox, or Nintendo Switch requires additional steps, including obtaining development kits and licenses from the respective companies. Unity provides specific instructions and support for these platforms.
- Exporting Your Game:
- In the Build Settings window, select the desired platform and click Build. Choose a location to save the build, and Unity will compile your game into a playable format.
Marketing and Distribution
Getting your game in front of players is a crucial step. Effective marketing and distribution strategies can make a significant difference in your game’s success.
- Strategies for Promoting Your Game:
- Social Media: Leverage platforms like Twitter, Facebook, Instagram, and TikTok to build a community around your game. Share development updates, behind-the-scenes content, and engage with your audience.
- Press Releases: Send out press releases to gaming websites, blogs, and influencers. Include a compelling story, high-quality images, and a demo if possible.
- Community Engagement: Participate in forums like Reddit, GameDev.net, and Unity’s own community. Share your progress, ask for feedback, and build relationships with other developers and players.
- Platforms and Stores for Distribution:
- PC: Steam, Epic Games Store, GOG, and Itch.io are popular platforms for PC games. Each has its own submission process and fee structure.
- Mobile: Google Play Store and Apple App Store are the primary distribution platforms for Android and iOS games. Ensure your game meets their respective guidelines and requirements.
- Consoles: Xbox Marketplace, PlayStation Store, and Nintendo eShop are the main channels for console games. Releasing on these platforms typically involves more rigorous approval processes.
Continuous Learning and Improvement
The journey doesn’t end with the release of your game. Continuous learning and community involvement are key to staying current and improving your skills.
- Resources for Further Learning:
- Tutorials: Unity’s Learn platform offers a wide range of tutorials covering various aspects of game development. Websites like Udemy, Coursera, and YouTube also have excellent courses.
- Forums: Join forums like the Unity Community, Stack Overflow, and GameDev.net to ask questions, share knowledge, and learn from other developers.
- Courses: Consider taking more structured courses from platforms like Udacity, Coursera, and edX to deepen your understanding of game development concepts.
- Importance of Community Involvement and Feedback:
- Feedback: Actively seek feedback from players and other developers. This can provide valuable insights into how you can improve your game and your development process.
- Networking: Attend game development conferences, meetups, and online events. Networking with other developers can lead to collaborations, job opportunities, and new learning experiences.